Welcome to the installation guide of XO WordPress Theme. XO is a clean and minimalistic theme for fashion and lifestyle bloggers. It features a homepage layout with a Slider, Sticky Navigation Bar, Styled About Widget, Popular Posts Widget and a Shopping Widget for shopping experience and its compatible with all major affiliate networks. The Theme features also a Search and Social Media Widget in the Navigation Bar as well as Related Posts Widget. Follow the guide below to install the XO Theme or shoot us an email for professional help with the setup: hello@munichparis.com
1. Theme Upload and Installation
Navigate to your WordPress Dashboard and click on Appearance > Themes.
Now click on the Add New button on top of the page and then click Upload Theme.
Choose the XO.zip file from the XOTheme folder you downloaded.
Important! Don’t upload the whole XOTheme.zip folder! If you get a ‘Theme is missing the style.css stylesheet’ error you have probably uploaded the wrong folder.
Click on Install Now and once it is installed, click the Activate button.
Setup Menu
Navigate to Appearance > Menus.
Click the „Create a New Menu“ button > Choose a menu name.
Be sure to check the „Primary Navigation Menu“ box at the bottom of the page.
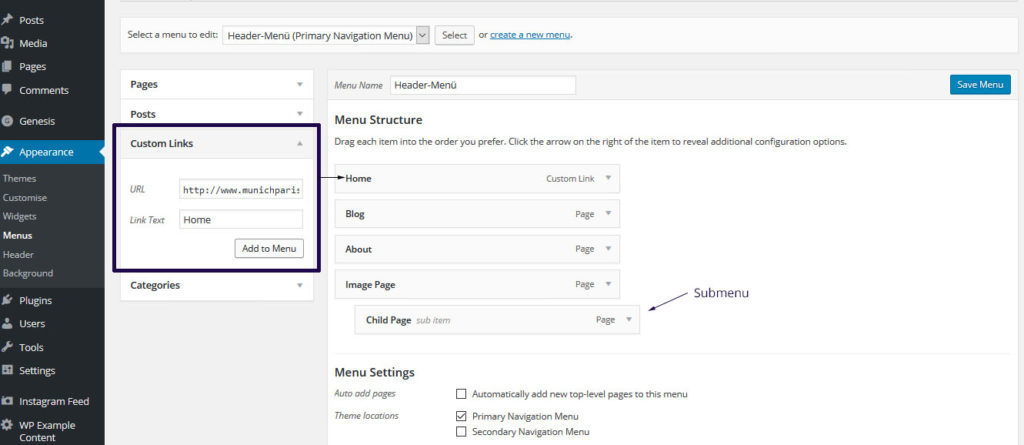
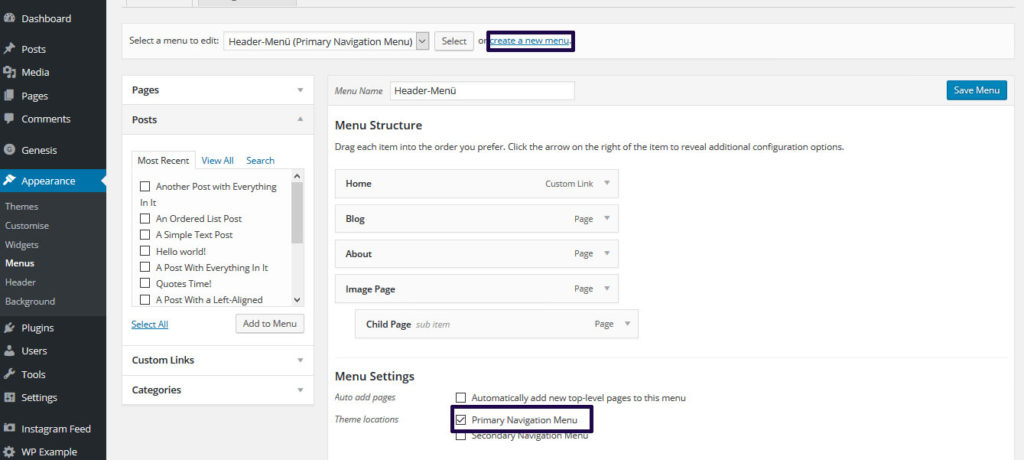 On the left side you can choose between adding Pages, Posts, Custom Links or Categories to the menu.
Pages/Posts: You can select from previously created pages/posts, e.g. About or Contact page.
Custom Links: You can insert custom links from other sites. You can use this option to add a link to your homepage. Enter your homepage’s URL into the box and give it a title, such as „Home“.
Categories: Here you can create category pages that will automatically display all posts from the desired category.
Sub Menu: You can create sub menu items by dragging the items below the other menu items. To create an empty parent element, select „Custom Links“ and put a „#“ into the URL box.
Social Media Icons
The XO theme comes prepackaged with ten of the most relevant social media icons.
Navigate to Appearance > Customize > Paris Theme Options.
In the left menu select „Social Media Icons“.
Add your relevant social media Usernames in the input boxes. If you leave a box blank, the particular icon will not appear. Pre existing values in the boxes can easily be deleted. Just type in your relevant username and you’re good to go. Don’t forget to click on Publish!
ADD YOUR OWN HEADER
You can choose between your blog’s title or adding a custom header image.
Blog Title as a header:
Navigate to Settings > General.
Set your blog’s title as Site Title. Additionally you can add a tagline.

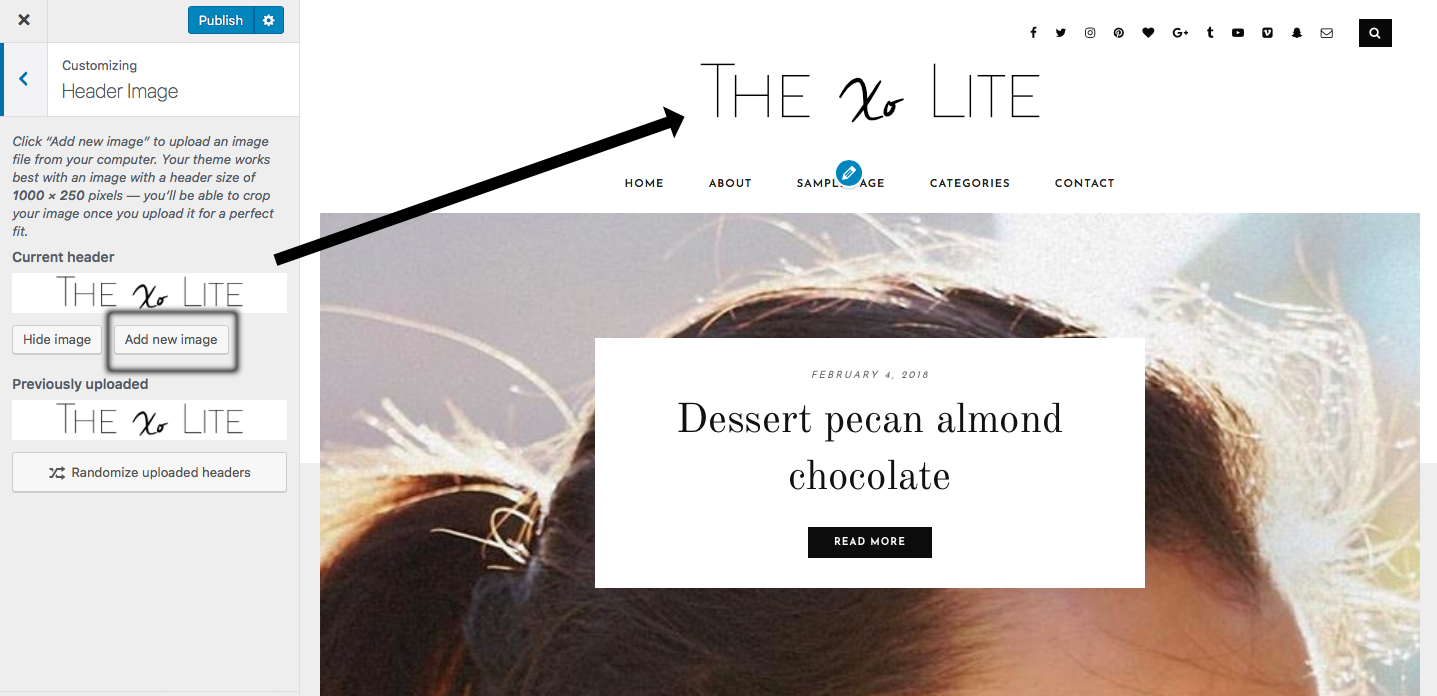
Custom image as header:
Navigate to Appearance > Customize.
Select Header Image on the left and click the „Add new“ button to upload a new header image.
Welcome Section – XO About Widget
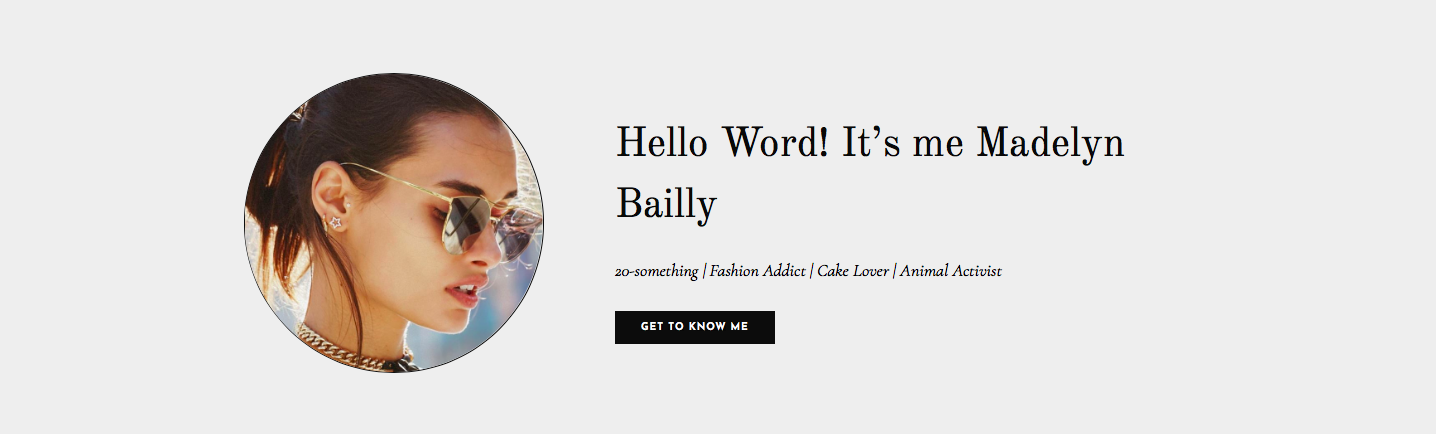
The XO Theme features a Welcome section right below the slider. It’s a great way to show your readers who’s behind the scenes of your blog.
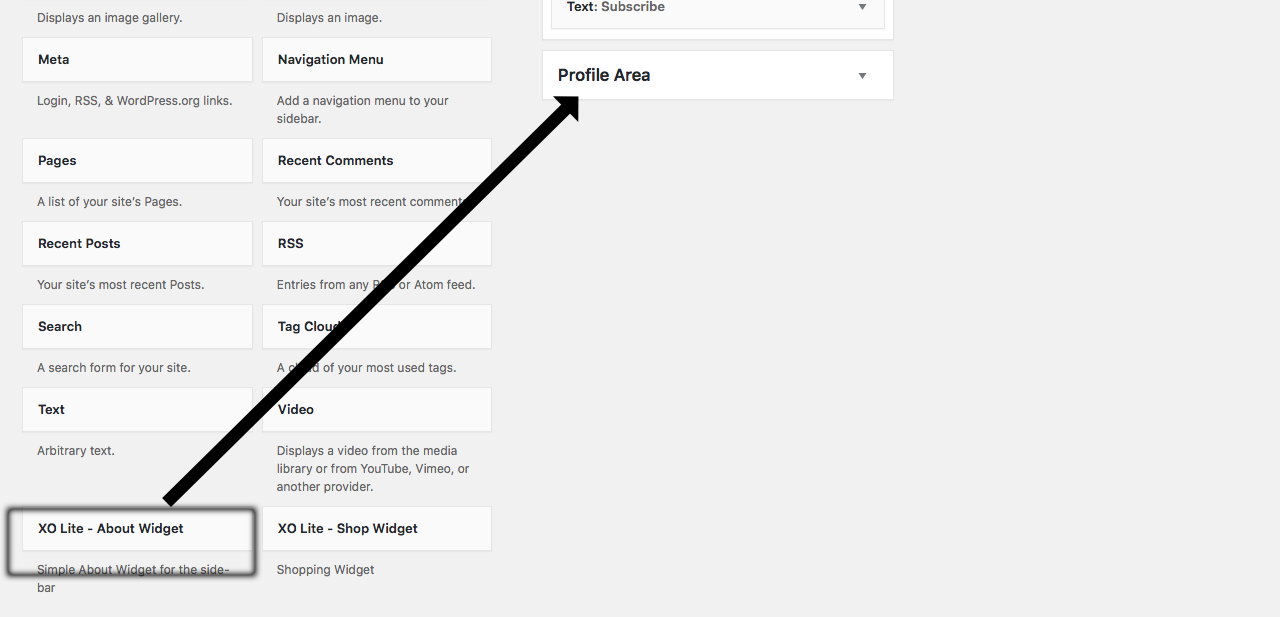
Go to Appearance > Widgets. You will see a widget area called Profile Area.
From the available widets on the left, select XO – About Widget and drag it into the Profile Area.
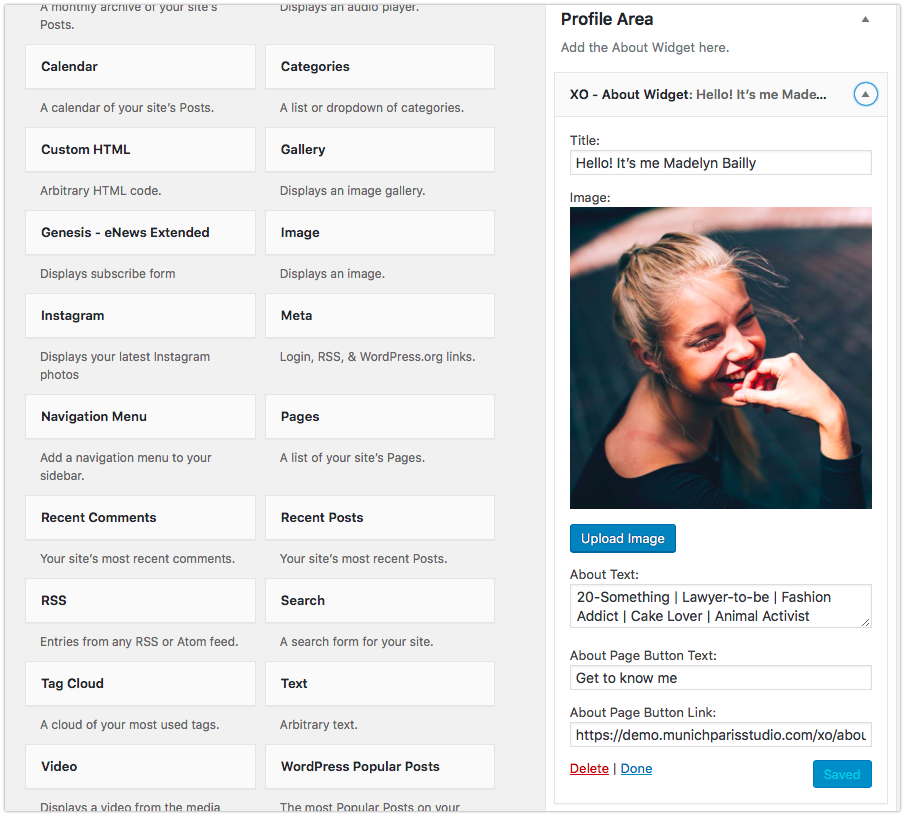
You just need to fill in the fields and your welcome widget is ready! If you should find pre existing stuff within the boxes, just delete them and fill in the fields with your own stuff you like to read. Don’t forget to click on Save!
Currently Craving Section – XO Shopping Widget
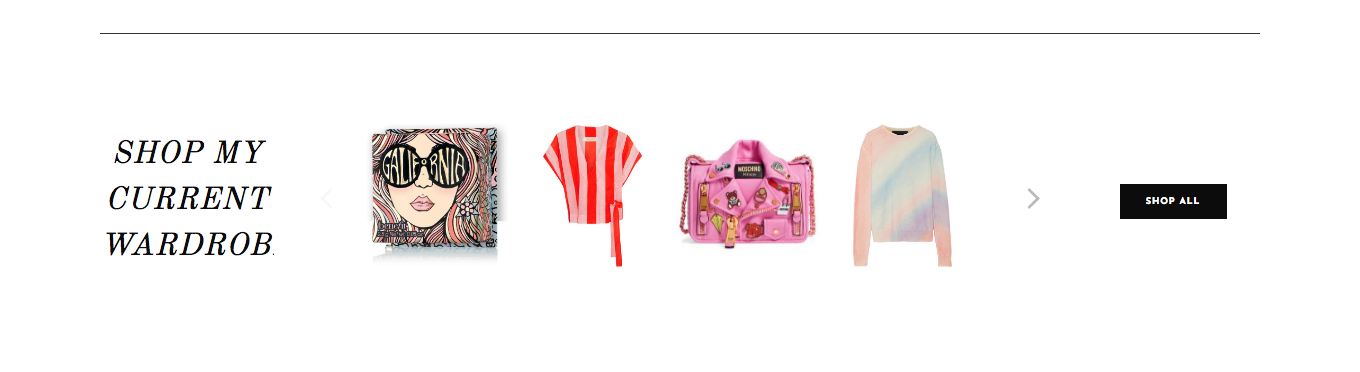
Show your readers your favorite pieces right on the homepage and make your wardrobe ready-to-shop!
Please note:
The product carousel widget is a third-party widget from an affiliate network – it is not built into the theme. You can only use this section with a third-party code!
First, register for an affiliate network of your choice (see this article for tips and recommendations from us: Affiliate for Fashion and Lifestyle Bloggers: Which network should I choose?).
Log into your account and follow the steps on their website to create a new widget. You will get a code snippet or a shortcode – copy it.
Come back to your WP dashboard.
Navigate to Appearance > Widgets and drag the XO – Shop Widget from the left into the section Shop the Edits Area.
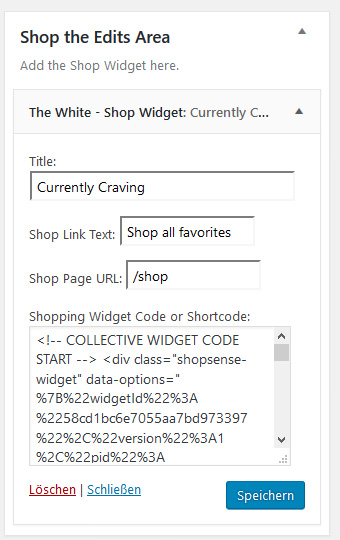
The copied code from your affiliate provider goes into Shopping Widget Code or Shortcode.
Optionally, you can add the black button on the right. Add a link to the desired page (e.g. your Shop Page) and the link text that the button should display.
Important! Add featured Images to your Posts
To get the maximum out of your theme we recommend that you always set a featured image to your posts. The homepage layout displays the set image as the preview thumbnail.
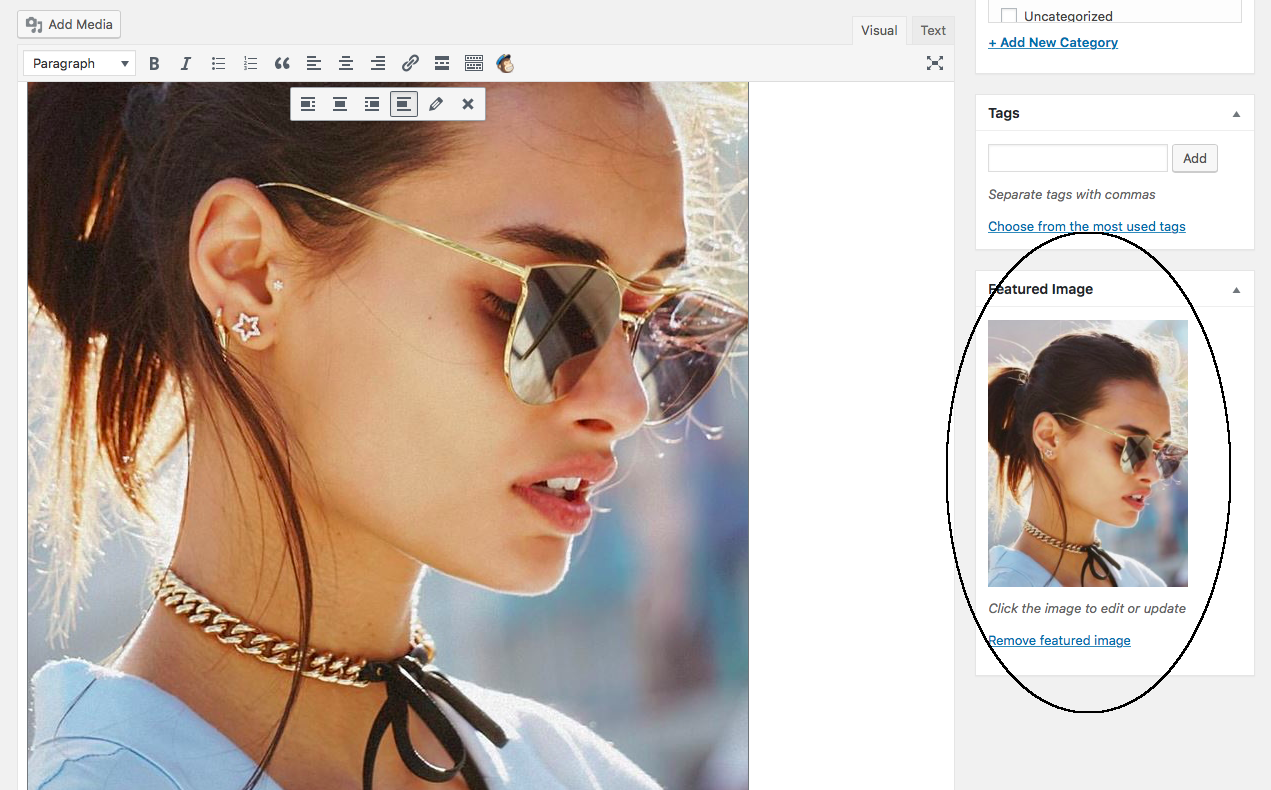
Go to your Post and scroll down till you see on the Featured Image Meta Box on the right hand side and choose the image of your choice.
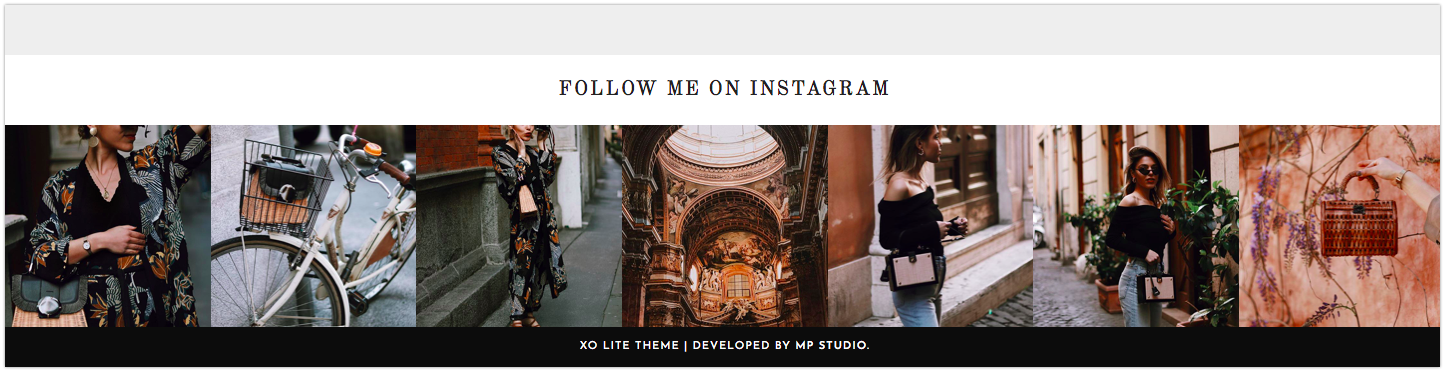
Pro Tipp: Display your Instagram Feed
XO Theme comes with a styled Instagram gallery at several areas like in the footer area and top section. The setup of it is super easy, all you need to do is:
UPDATE SEPTEMBER 2019!! WP INSTANT FEEDS PLUGIN BY MNMLTHMS IS NO LONGER SUPPORTED AND THEREFORE STOPPED WORKING. PLEASE REPLACE PLUGIN WITH FOLLWING:
Go to Plugins and Add New – search for the ‘Social Photo Feed’ plugin by smash balloon and activate it. Navigate back to your WP dashboard and locate the plugin on the left hand side menu near bottom => INSTAGRAM FEED. Click on it to start setting up the plugin.
- We’ll start with the configure tab where we will connect the plugin with your Instagram account via the Instagram Access Token. This is needed & required by Instagram to authorise the display of your feed on your blog / website. To generate the access token please visit this site and follow the steps to create your access token (long string of numbers and alphabets). Click on the ‘manually connect your account’ button and paste the access token into the required field. Save your progress!
- Now we will style the Instagram gallery so it will look exactly like the demo version. For this please click on the customise tab of your plugin (next to configure tab). At the general section the width of the widget is automatically set 100% and you don’t need to do anything further. Leave height blank. Next set the number of images you like to display in your Instagram gallery. Depending on your theme please set a number and also define the number per columns. For example when the number of images is 12 set the number of columns 6 – this is create 2 rows. Also important please leave the ‘padding around images’ blank or zero value. Please tick the box ‘disable mobile layout’ in order to make the Instagram widget responsive and mobile friendly! Another important thing is to uncheck all the unnecessary check boxes like header, load more and follow buttons. We want the widget to look slick and minimal. Don’t forget to save your changes.
- After we’ve prepared the plugin and set it up correctly we can now integrate the Instagram Feed onto your blog / website. Please navigate to APPEARANCE => WIDGETS and drag a Custom HTML widget to the designated widget area you like to display it. Type in your title and copy paste flowing code into the value field: [instagram-feed]. Don’t forget to save the changes. Voila your Insta Feed is back online!
EXTRA SOURCE: Since this is a very recent change and not all MPS Themes have been updated yet, please add this little extra code snippet to your ADDITIONAL CSS panel. This is will solve the issue with the ugly gap between widget bottom and footer area. Navigate to APPEARANCE => CUSTOMISE => ADDITIONAL CSS and copy paste following code: