This post contains affiliate links. We will receive a small commission if you buy through one of these links.
In this comprehensive guide I want to share with you how you start a blog. I want to answer the question: How do I start technically? How can I get found by interested readers, how can I present my content in a nice way and finally how can I step into the world of blogging professionally?
Many bloggers make money with their blogs and all of the them have started at this point. Go through this series and at the end you will have a blog set up to start blogging, growing and making your favorite hobby your paycheck. Let’s start!
Overview: Start a successful Blog – The Tech Guide for Beginners
Part 1 (this post): The Blog Ecosystem – WordPress, Hosting and Domain
Part 2: How to find the perfect Theme for your Fashion Blog

This first post is about finding the right blog system and getting started with hosting, domain and WordPress installation.
WordPress.com vs. WordPress.org
You may have seen that there are a couple of different platforms you can use to start a blog. There is Blogger.com, Squarespace – and, of course, WordPress. But did you know that there are also two forms of WordPress? You can decide between WordPress.com and WordPress.org. Let me explain why your choice should always be WordPress.org:
WordPress.org is the self-hosted way of starting a blog
Self-hosted means you own the webspace where your blog lives. You have full control over everything, you can install all themes and plugins you like and are not limited in terms of design and functionality. Plus, going self-hosted is normally less expensive than being bound to a host like Squarespace or WordPress.com.
If you are serious about blogging and want to start a successful blog to earn money with blogging, you should definitely use WordPress.org.
3 Things you need to start a blog with WordPress.org
Getting started with WordPress.org is actually super easy – you only need these three things to launch your own blog:
- Webhosting + a domain (which normally comes with your hosting plan)
- WordPress software (which normally also comes with your hosting)
- 30 minutes of time
Wow, that’s easy, isn’t it? Maybe you don’t exactly know what I’m talking about, but you will in a minute. Here are the steps you have to take to setup your own WordPress blog.
1. Get a Webhosting Plan and Domain
For WordPress.org you need a little space somewhere on the internet to save all your posts, themes, and settings to. That’s your webspace, which you’ll get from a webhosting company. We recommend bloggers who want to start to use Bluehost because they have a special WordPress plan which offers reliable performance, super duper support and is very affordable. The WordPress software will also be installed there automatically, so you don’t have to mess with the installation.
If you decide to go with Bluehost, the basic plan is totally enough for starting out. It offers a free domain, 50GB storage, as much traffic bandwidth as you need, SSL encryption and 24/7 support. The sign up process is as easy as ordering a cup of coffee in your favorite café.
To sign up for a hosting plan, follow the steps below or watch the video where I show you the full process.
Select the basic plan
Click here to select a webhosting plan
Click on the green “Get started now” button and then select the “Basic” option.
 Choose a Domain Name
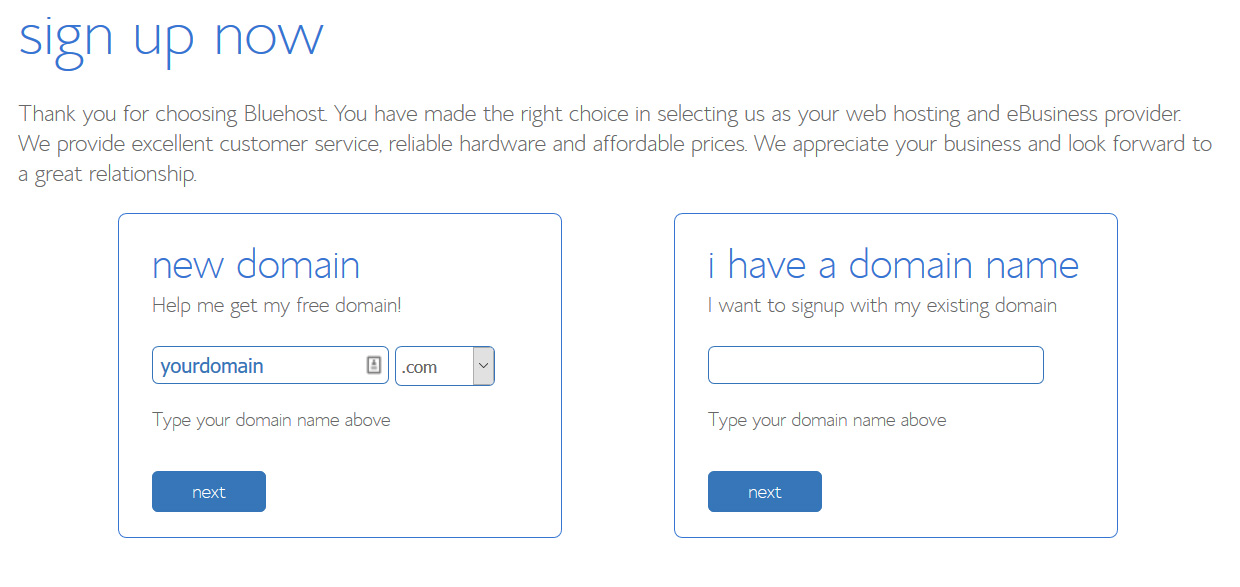
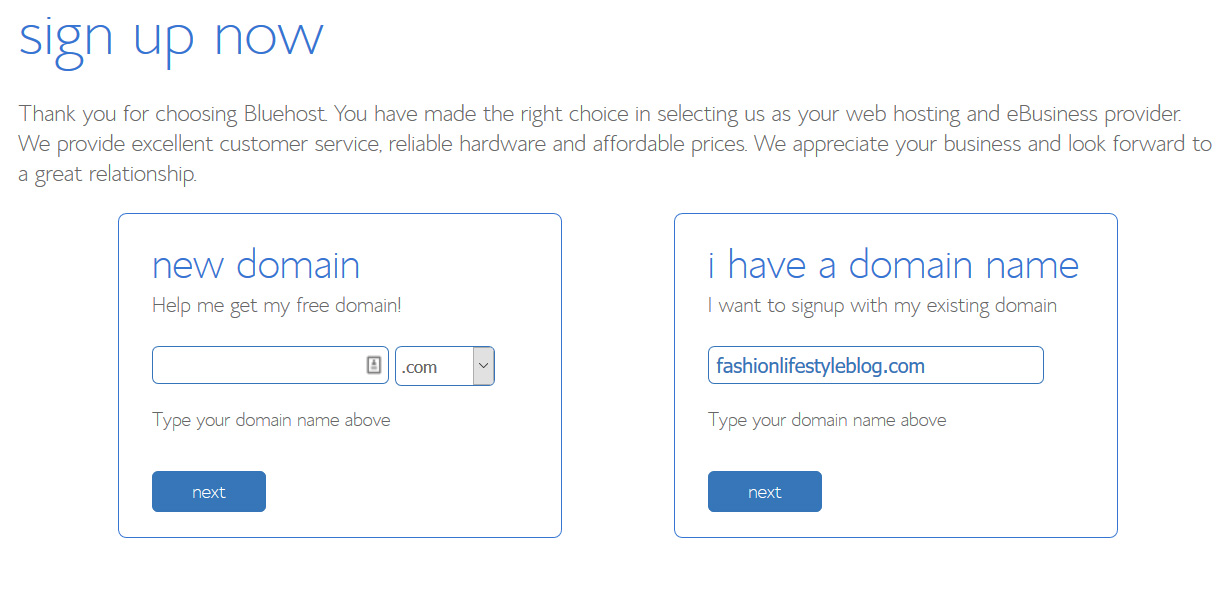
You have two options here: Choose a new domain name or migrate an existing domain (put your domain name in here if you want to move an existing blog with domain from Blogger, WordPress.com or Squarespace to WordPress.org).
Example 1: You don’t have a blog yet and want to start from scratch
Choose a domain name and check if it is available. Then click on “Next”.

Example 2: You want to migrate an existing blog from Blogger.com, WordPress.com, Squarespace or another platform which uses the domain www.fashionlifestyleblog.com
Put your existing domain name in the box and click on “Next”. Bluehost will take care of the domain migration for free for you.
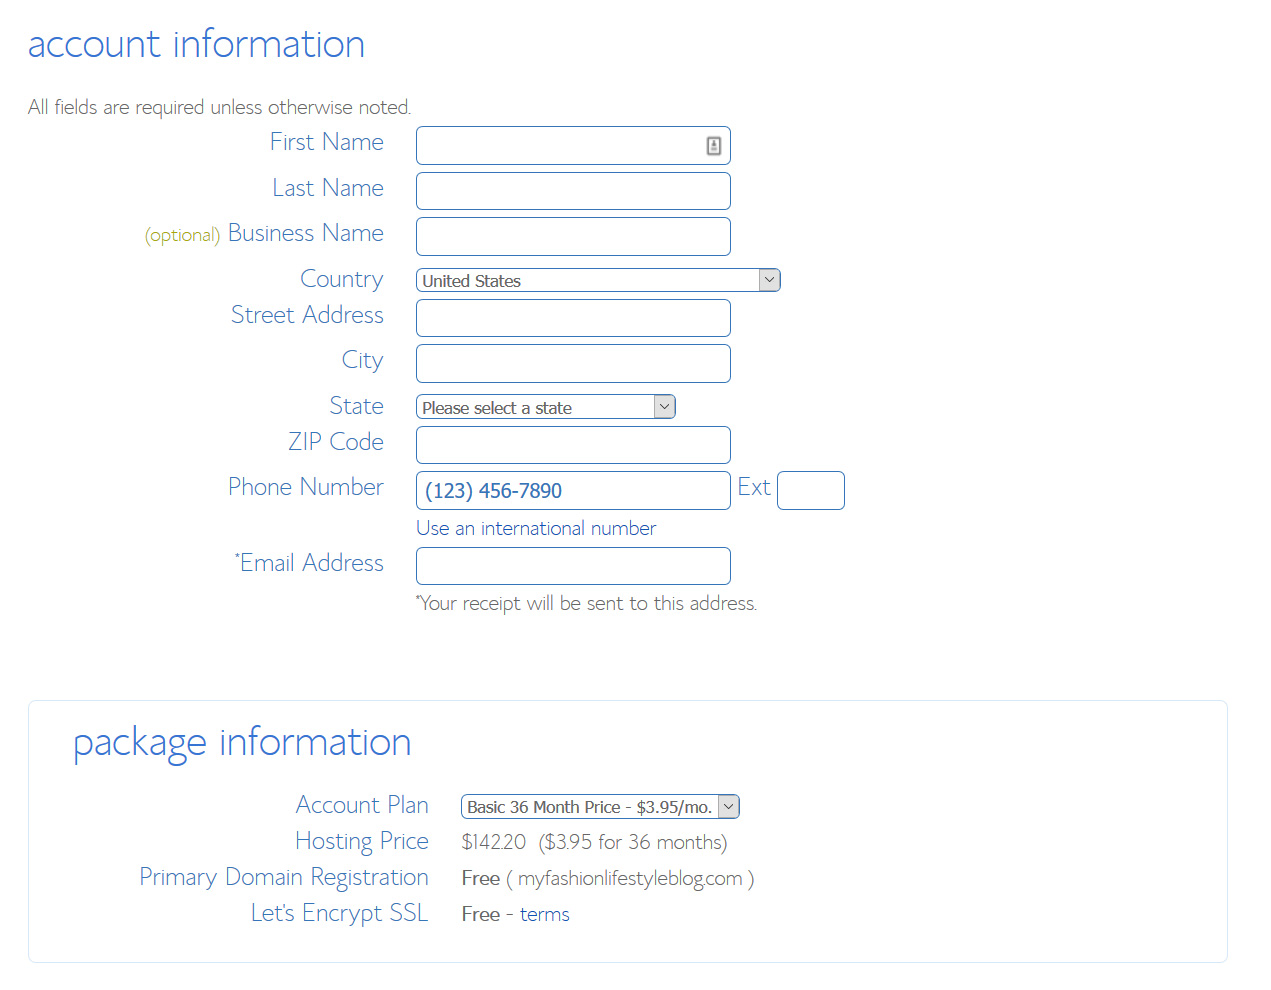
 Add your Personal and Payment Information
Now you can put in your account and payment details and choose a subscription length.

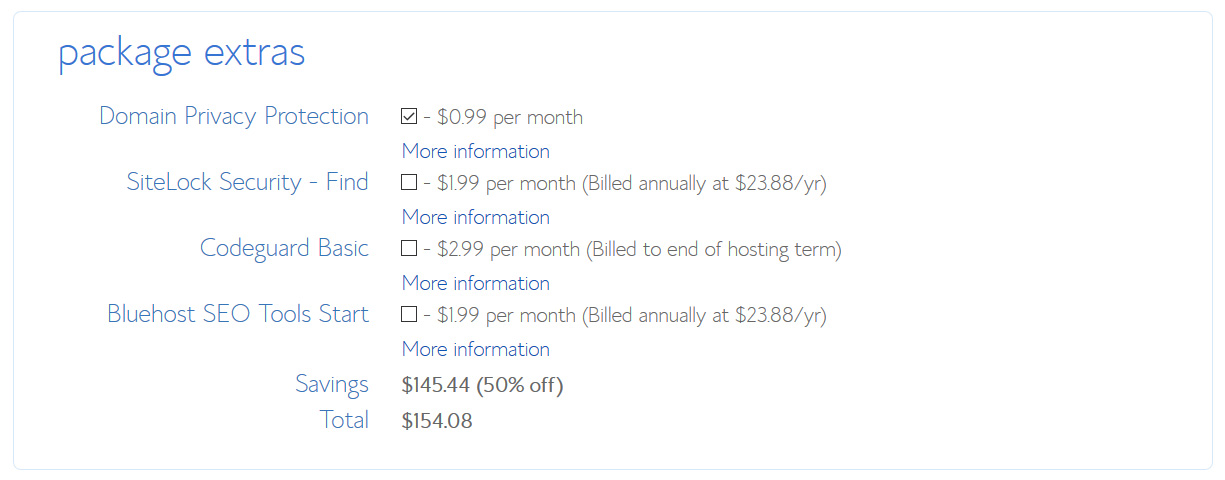
Package Extras
Bluehost tries to upsell some more packages, but honestly, you won’t need them. The only thing that makes sense is the Domain Privacy Protection which will hide your name and personal information so not everybody can access your address and full name when searching for your domain in the registrary.
You can uncheck the other boxes.

Finally, add your credit card or other payment details and click the green “Submit” button.
If you are unsure about the subscription process, I have recorded a little video below that shows the whole process again. Simply follow the steps outlined here and you can start a blog with your new Bluehost hosting.
2. Install WordPress
Now you have your webhosting set up (that was easy, wasn’t it?), and you can login to your account to install WordPress.
Good news: If you have chosen Bluehost as a hosting provider, WordPress will be installed automatically.
If you have another hosting provider, in most cases you will have to install WordPress separately. Most providers offer the famous WordPress 1-click installation. Just try to search for it on Google or contact their support if you are unsure how to do it.
3. Login to yourdomain.com/wp-admin
Yes, you got it! Navigate to the URL above (replace it with your new domain name and don’t forget to add /wp-admin to the end of it) and login with your username and password.
Congratulations! You have just successfully set up your own WordPress blog! You can now play around a bit, maybe even write you first post, and get used to the feeling of having your own little piece of the internet out there.
If you have questions about the hosting signup process or the WordPress installation, drop us an email (hello@munichparis.com) and we will help you get started!
What are the next steps?
If you have successfully set up your hosting, you can go on to the next post which tells you how to find the perfect WordPress theme for your new blog.


