
Do you wonder how to put together those product shopping sliders that show your latest wardrobe favorites or the things you are currently craving? Then this little tutorial is for you. Integrating a shopping widget into your blog like in our Madrid or Paris Theme can enhance the overall experience of your readers and if you decie to use affiliate links it will also help you to monetize your content without a lot of effort.
Although we always recommend to partner with an affiliate network like Shopstyle or Rewardstyle to create shopping widgets, you can easily create those shopping carousels on your own as well – with a little help from a cool WordPress plugin that we will show you today.
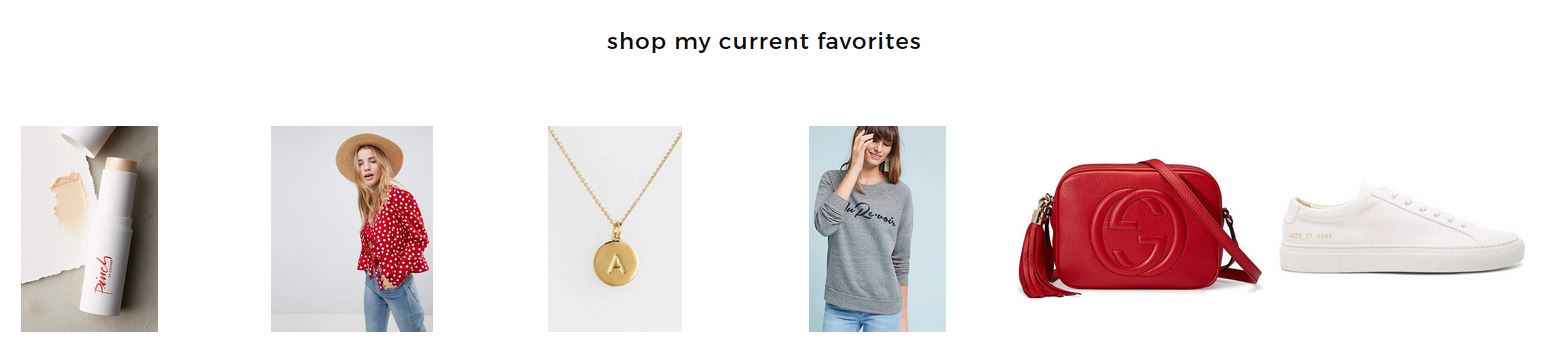
Follow the steps below and create your own “Currently Craving” or “Shopping Favorites” widget for your homepage or integrate the products into your outfit posts.
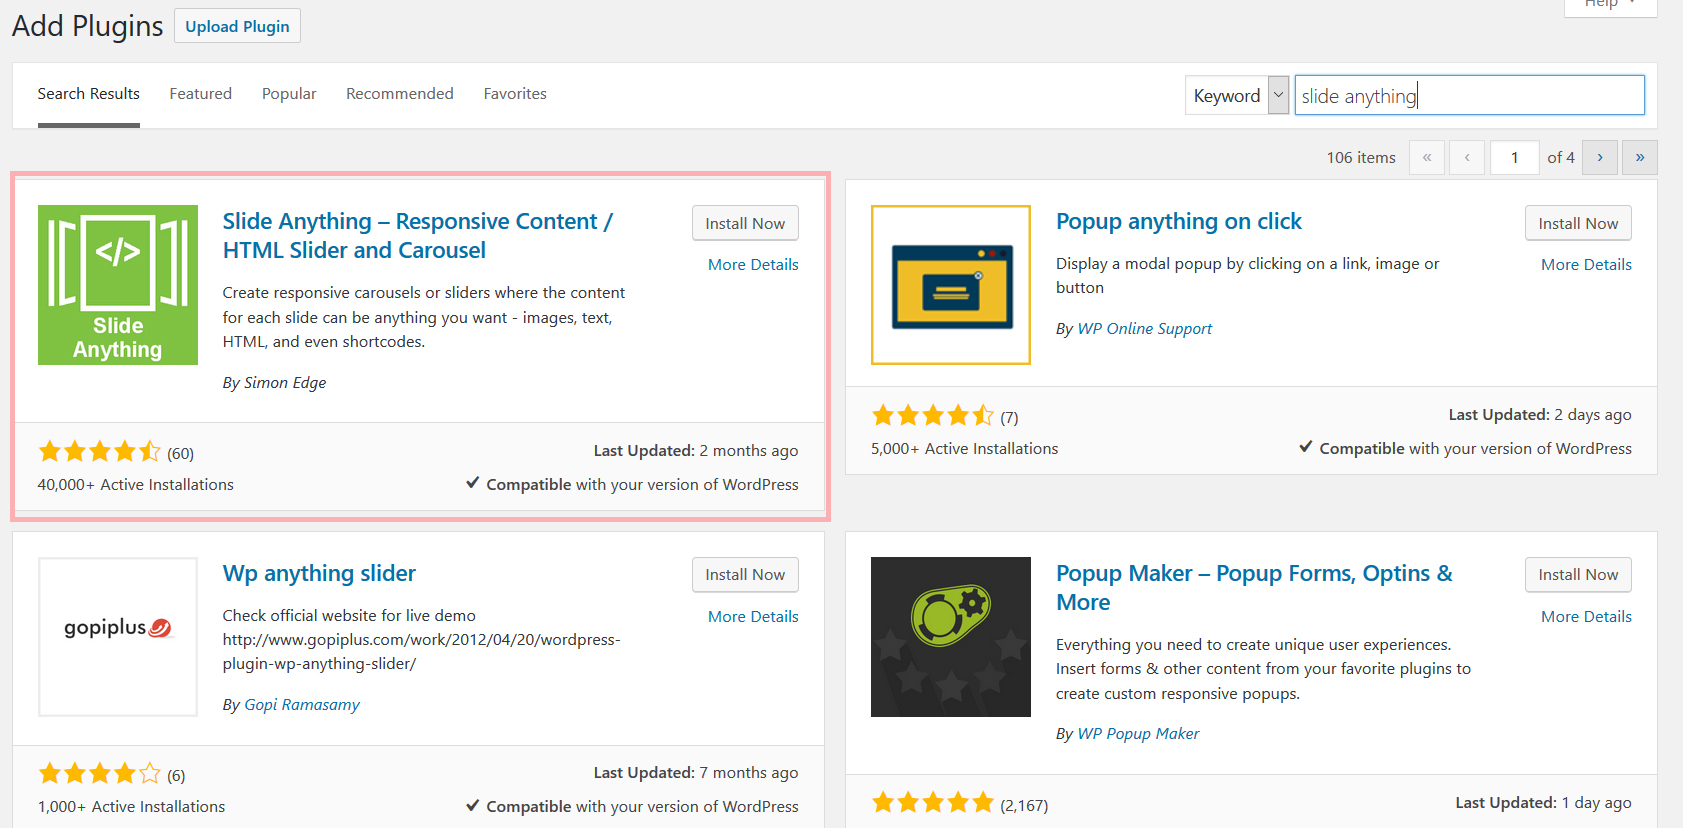
1. Download the Slide Anything plugin
In your WordPress dashboard, navigate to Plugins > Add new and search for Slide Anything. This is a very handy slider and carousel plugin that will allow you to add literally any content into a beautiful slideshow or carousel. You can not only add images, but also a little description about the product and of course link to the shop site.
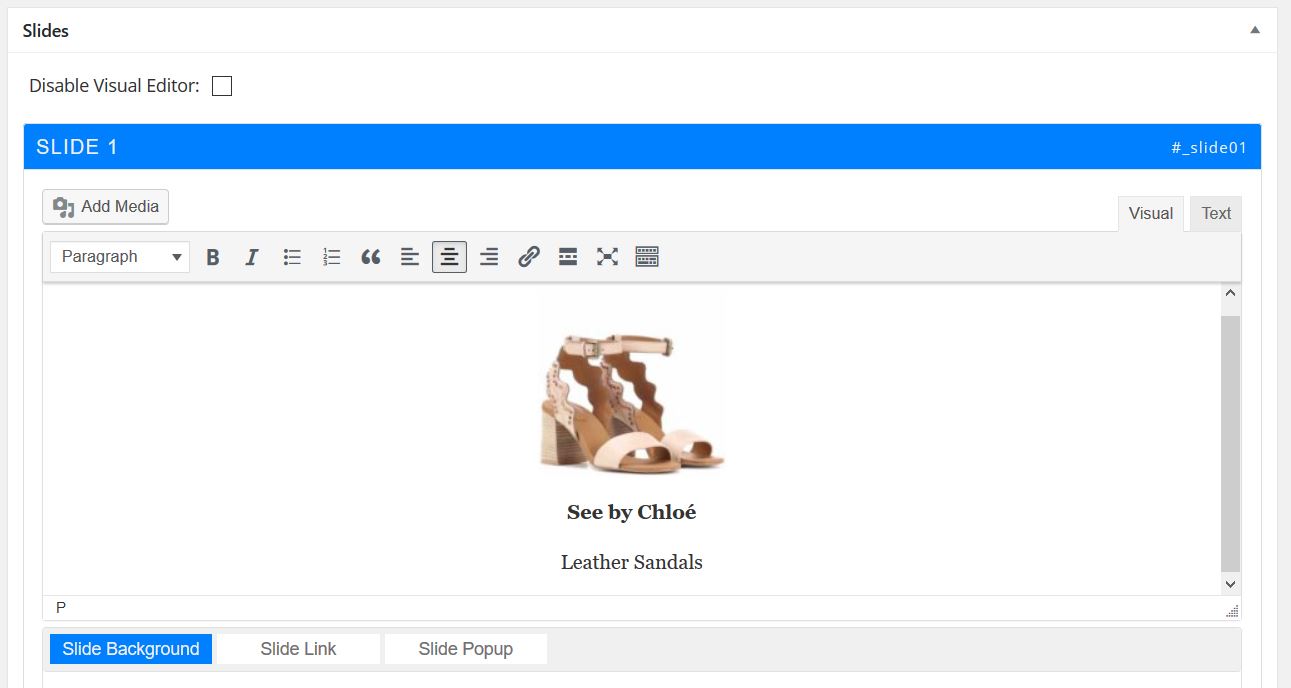
2. Add product images and details
Once you have activated the plugin, you can start creating carousels and sliders with your favorite products. Navigate to SA Sliders > Add new Slider. Now you can click through the settings, change width, height, padding, duration and many more things. And, most important you can add your slide content in the easy to use visual editor.
You can add images, text and stylings as you would in a normal blog post.
Click on Slide Link to add a link to the product.

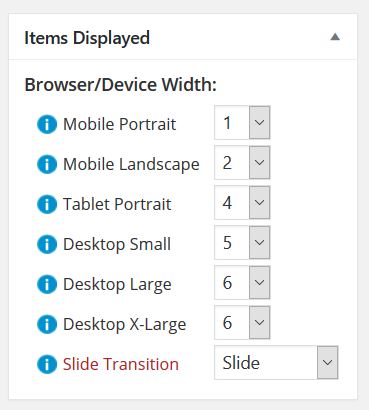
3. Create the carousel widget
To make it a carousel widget that shows more than one slide next to each other, look for the Items Displayed box on the right side. There you can set how many items should be displayed at once. The nice thing about the plugin is that you can also choose how many products to show on smaller screens on a tablet or your phone.
4. Add the widget to your blog
Once you are ready, you can copy the shortcode that display on the right side (in the Shortcode/Preview box) and paste it anywhere you’d like the shopping carousel to show. This could be on the homepage in a widget (use a Custom HTML widget for this) or somewhere in your posts or pages. Be creative!
We hope this little tutorial will help you to put together you own shopping carousel with your favorite products. It’s a great way to show your readers the things on your wishlist or enhance your blog posts with easy to navigate widgets to monetize your outfits or beauty posts.
