
WordPress is one of the top blogging platforms for spreading your content. One of the many reasons why to use WordPress is the easy process of creating posts (articles). This read will show you all the important basics as well as share some pro tipps on how to make sure to get the very best out of your posts.
1.) Getting started!
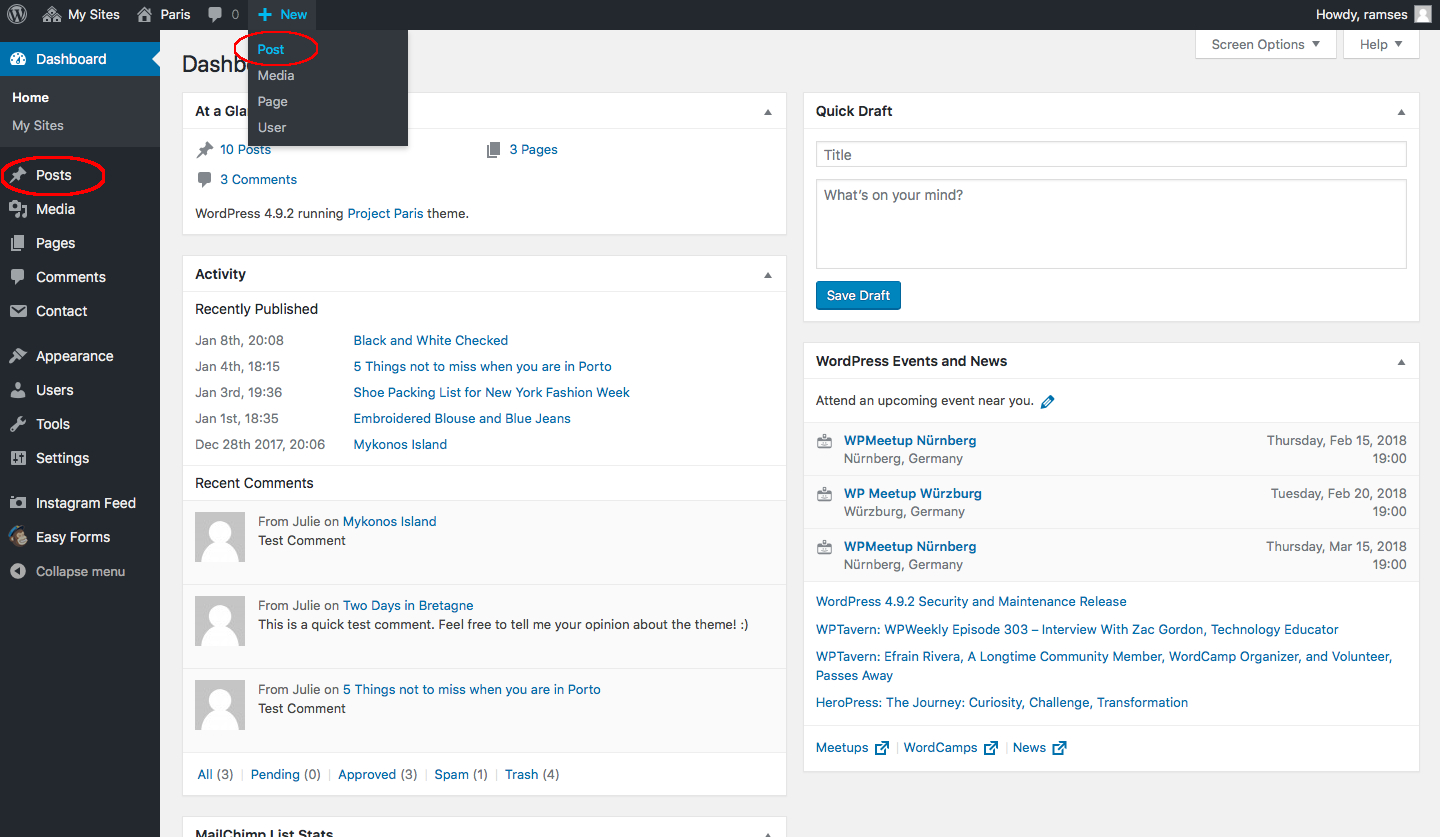
When logged in into your WP dashboard there are various ways on how to get into the Post Editor Screen (or begin a new post). You either go to your Toolbar (the black bar on top of your screen) and hover over +New and click on post or you check your left hand side of your main navigation and click old-fashioned on posts. There you can choose from your existent posts or create easily a brand new one.
Please explain the tools to me
All right, now that you’ve jumped into your post editor let’s look around and name all the stuff you see on your screen. The most obvious two are the (A.)Title and (B.)Content bars. Like you would have guessed there you simply type in your Title and underneath of it the Content you like people to read.
Now, let’s look at the (C.)Formatting Bar! If you’re familiar with MS Office you’ll recognise pretty much all of the formatting stuff. The one you will use the most is the (D.)Paragraph tab – here you’ll decide what to highlight and have your readers pay attention to. You can choose between multiple sub-heading and the normal paragraph (plain text).
Also, what you should use frequently is the (E.)Add Media tab – I explain this further down to you in detail.
On the right side of your post editor screen you have your meta boxes. Beginning from top to bottom: the (F.)Publish Meta Box let’s you decide when to publish, save or plan on publishing your post. The next one is the (G.)Categories Meta Box where you can label your posts with categories. This will come handy for the search bar of your theme or clicking on the categories on the main menu (Homepage). Last but not least is the (H.)Featured Image Meta Box where you can decide what picture will be shown (once published) on the homepage for your post.
Pro Tipp: On the right top corner of your content bar (slightly above your formatting bar) you find two tabs. (I.)Visual and Text! If you’re a beginner always make sure to have the Visual tab clicked. This will make sure that you’re in the right writing mode. The Text mode is for far more advanced WP user who are familiar with HTML. There you can typ the code on how the text should appear. If your curious try things out or leave for later.


Add Media to your posts
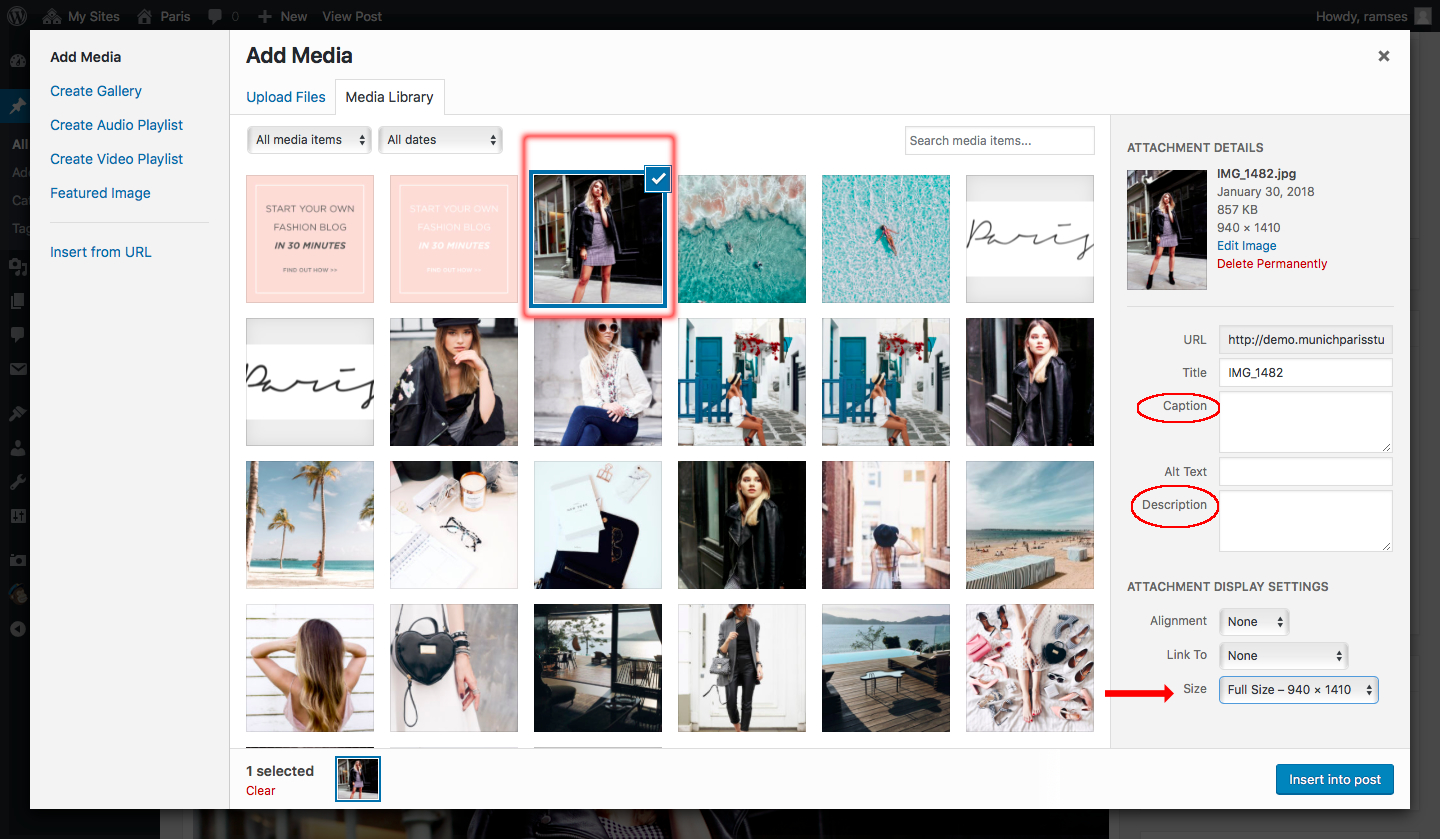
Adding pictures to your posts is always a good idea, so let’s make sure you’re a real master in handling the media part. When clicking on Add Media a popup will come up and you find yourself in the Media Library. Here you can either choose from the existing Library or you can upload your stuff to your library.
Click on Upload Files and upload either one or multiple pictures. Once uploaded they are in your library and you can use them as much as you like. If you see you desired picture click on it and you’ll notice a checking mark – this means that you’re good to go. You can also choose multiple pictures (on the Mac via holding the cmd key). After you click on blue tab Insert to your post on the right bottom corner you’ll get back to your post editor with your media file(s). To format the picture click on it and then click on the edit tab. Here you can decide the position and size of your picture.
We recommend to set your post pictures in the original size and choose position central but you’re free to live out your creativity and do what you think is best. If you don’t like a picture you can easily delete it with clicking on it and then click the x to remove it.

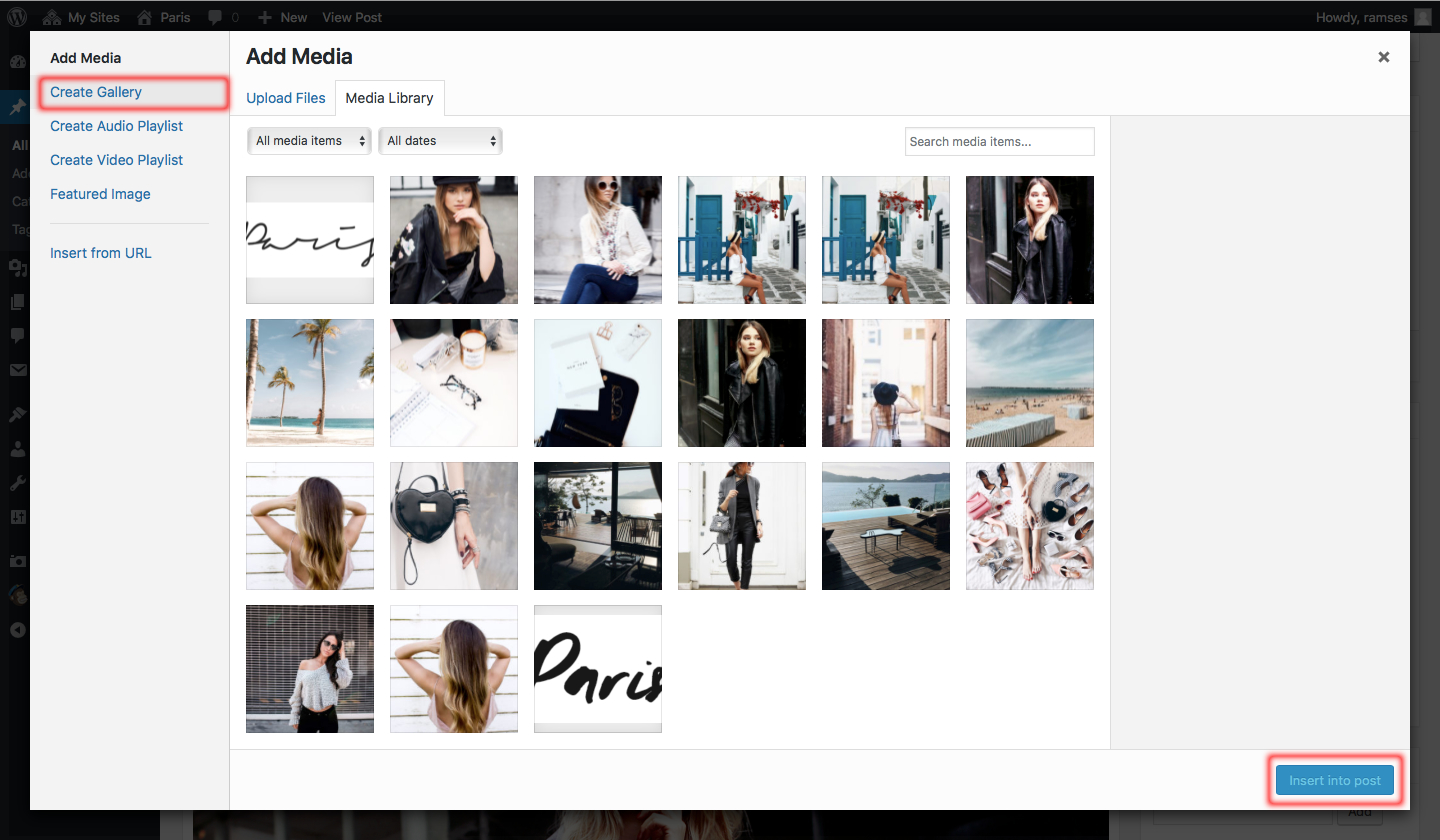
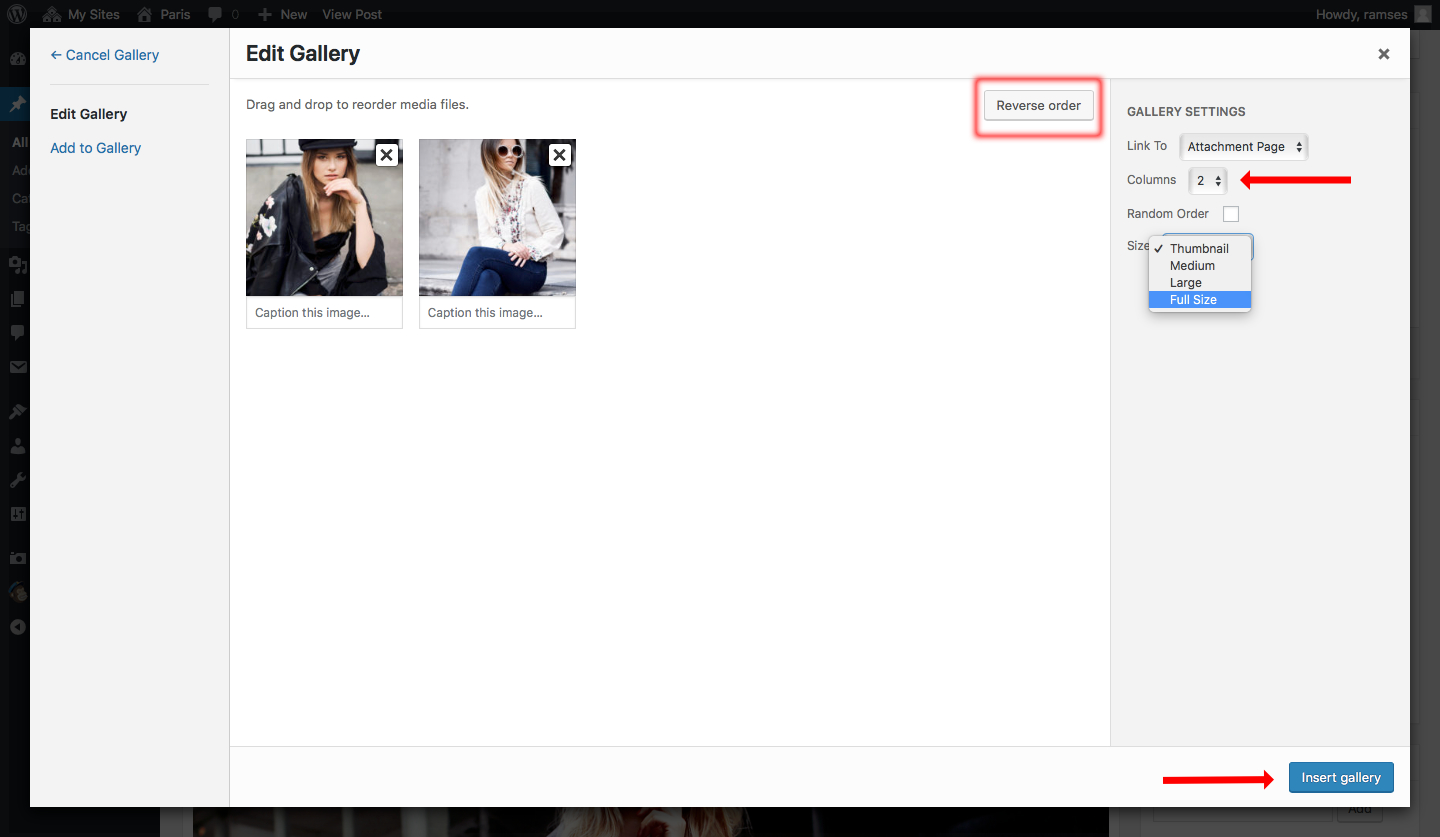
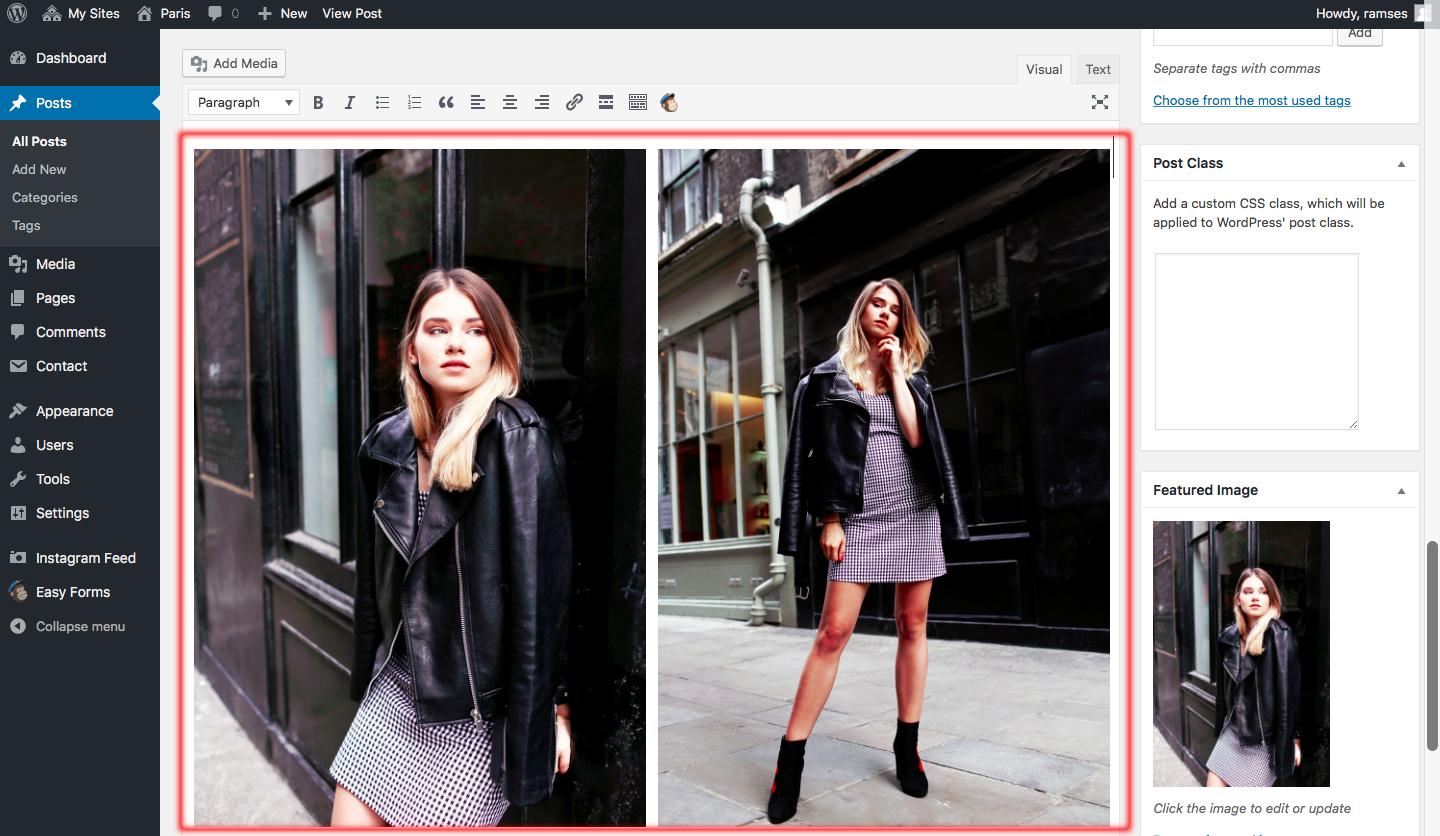
Pro Tipp: If you feel for change in the post layout of your pictures we recommend to try to do a Gallery. A Gallery can be two or more Pictures next to each other and help avoid the waste of too much scrolling time. We recommend to embed Gallery’s when you tend to have a lot of protrait pictures (vertical). This will give you a beautiful magazine look to your posts.
Setting Up the Featured Image
In principle you do the very same as mentioned above. You click on the Set Featured Image tab and follow the steps as described as in the Add Media to your Posts part. We recommend to set always a featured image for your posts!
Publish/Draft/Schedule
Once you are ready and finished with your post you can decide to immediately publish it or to publish some time later it via the schedule function (Click on Edit next to Publish). You find this features in your first meta box on the right hand side of your post editor screen. Simply try things out and you’ll see it’s not that much of complicated stuff.
Your little Summary
1.) Go to your Post Editor and add a new post.
2.) Give your post a catchy title
3.) Create some beautiful and creative content and format it via the paragraph tab. Make sure to use couple subheadings so your readers get the feeling of a good narrow.
4.) Add Media to your post to impress your readers. Set a featured image so it will look awesome on the homepage once it’s published.
5.) Give your Post categories so you have always a good overview.
6.) Publish immediately or plan on publishing some time later with the cool schedule tool.
7.) Done it – Awesome!
