Boutique Section
Madrid Theme gives you the opportunity to curate your own little shop via Affiliate products that you can create via your Affiliate Network. Momentarily only working with ShopStyle!! Tracdelight and RewardStyle will be added soon to the list!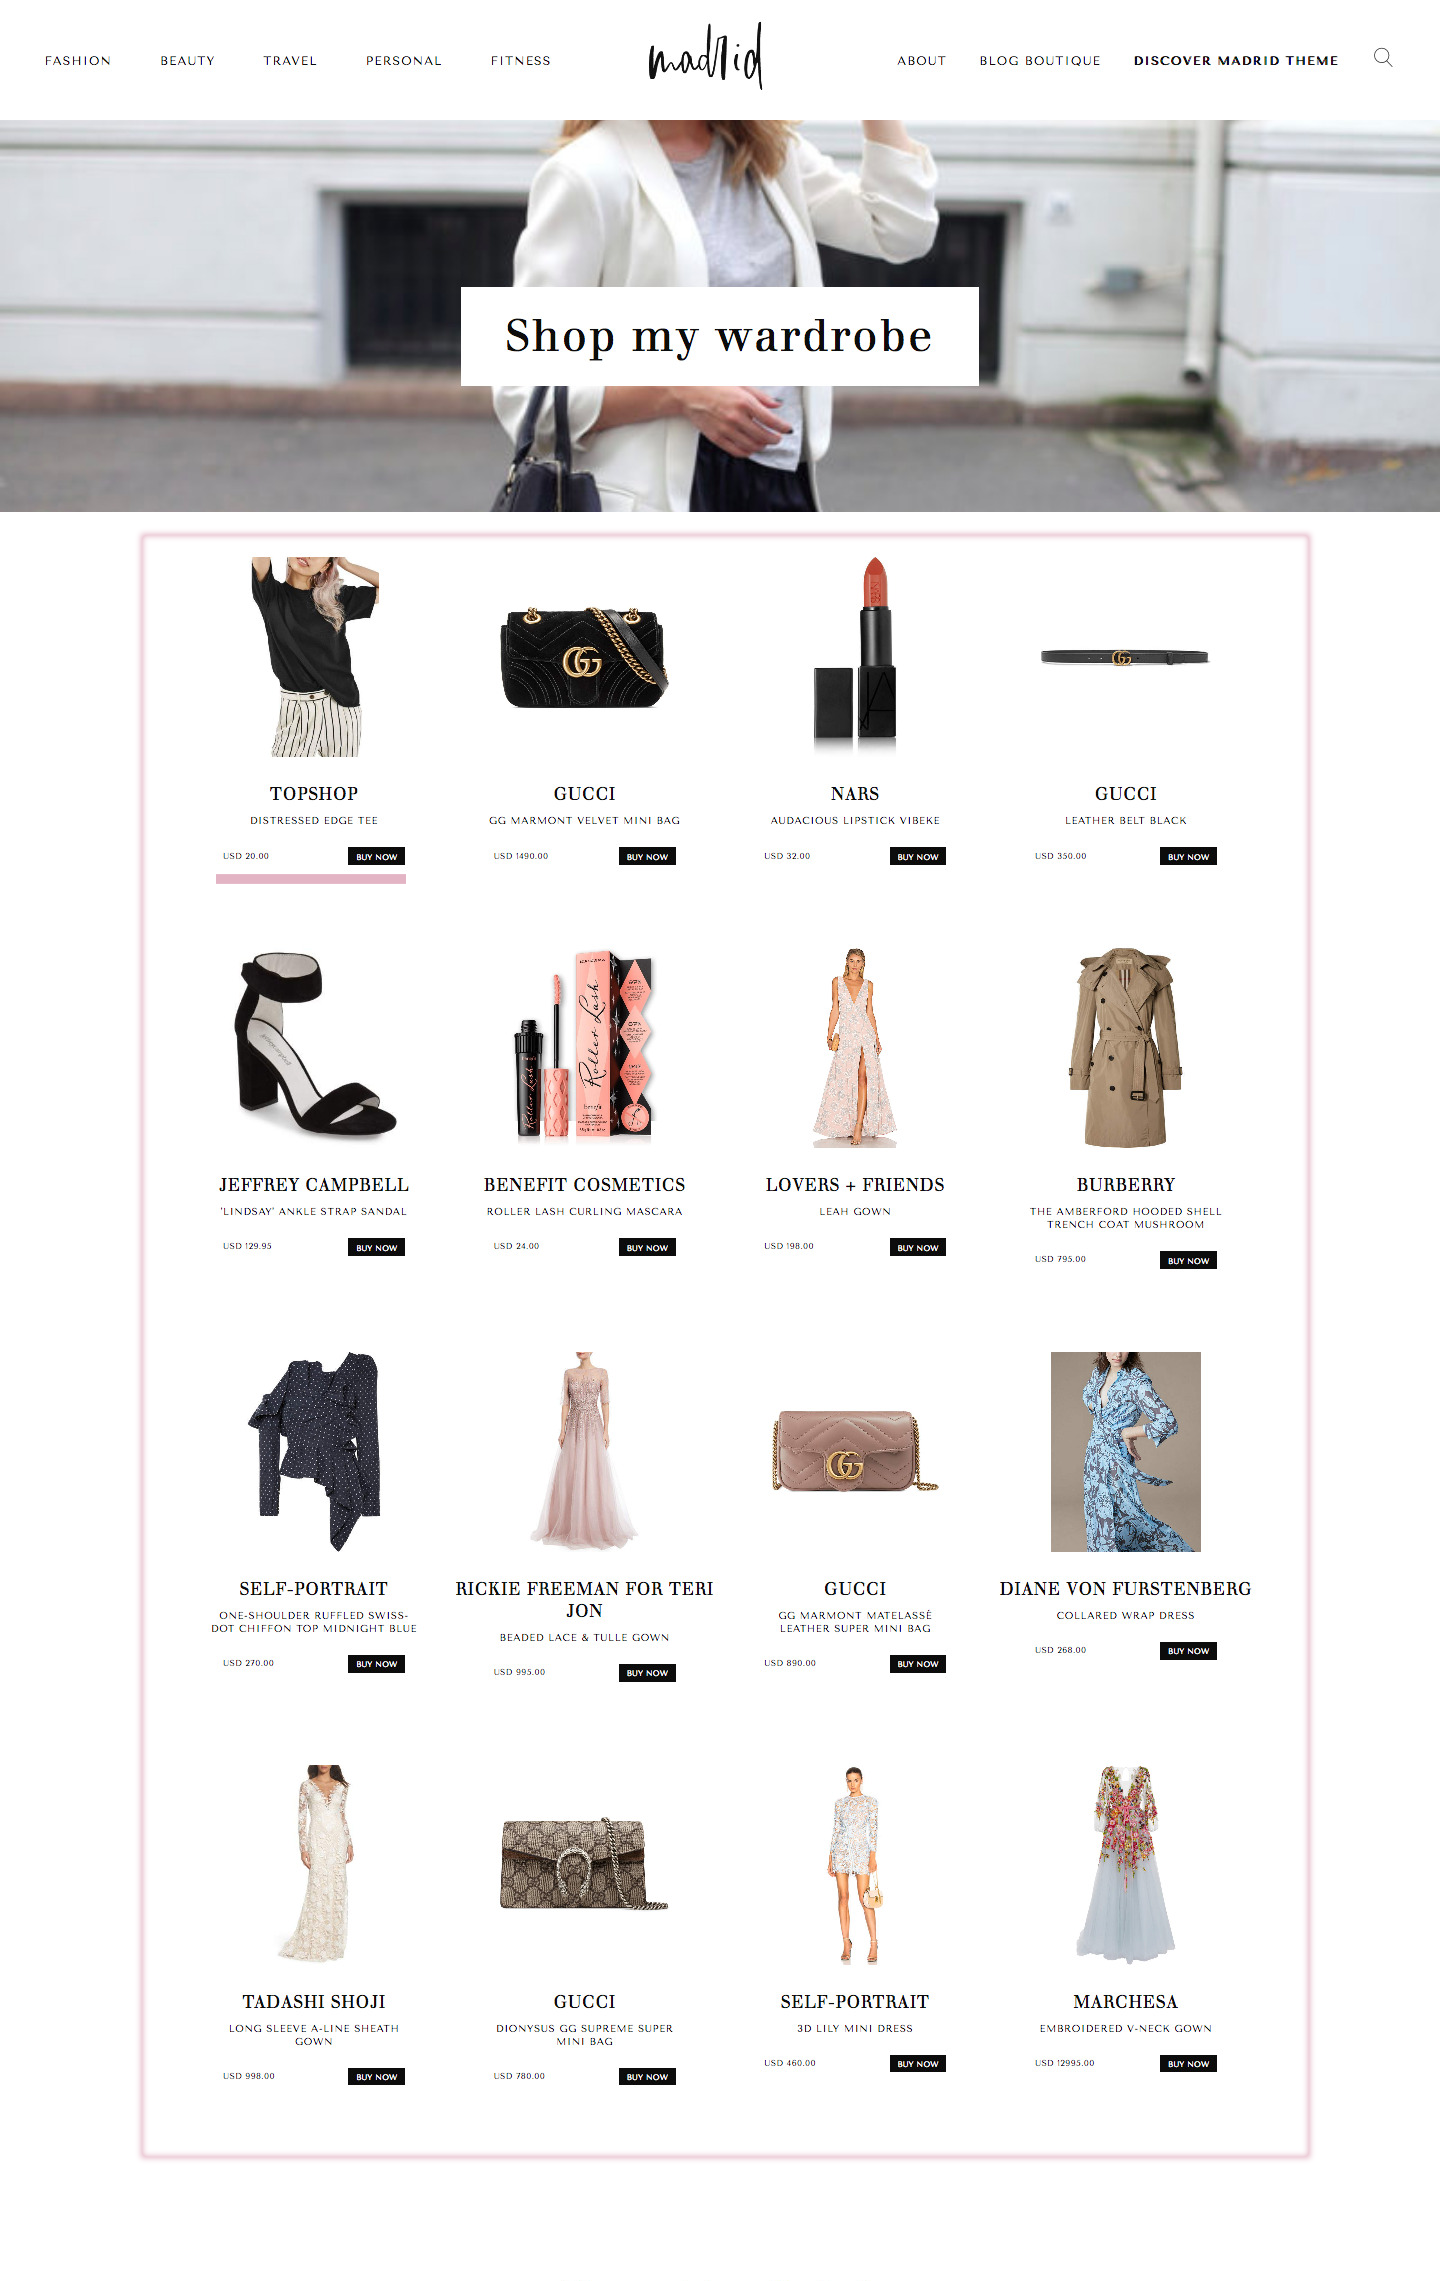
Preparing your Theme
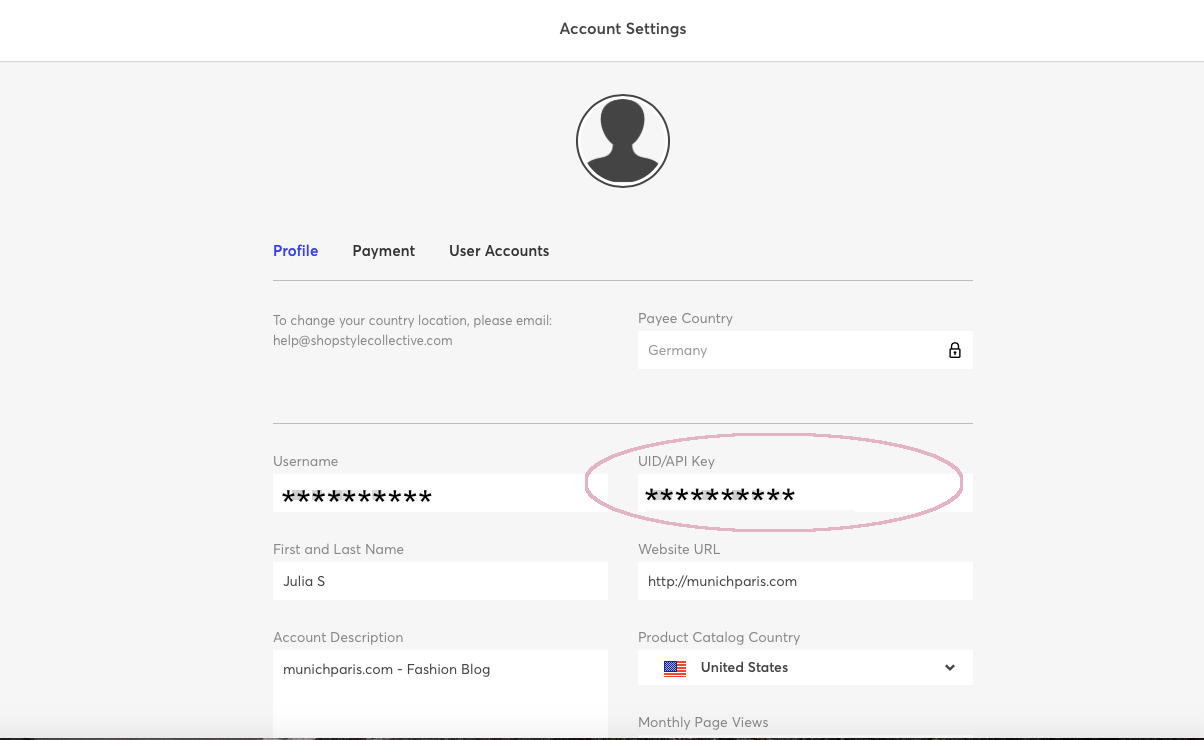
First thing you need to do is to login into your ShopStyle Collective Account and get your ShopStyle UID. You can find your UID by clicking your user name on the ShopStyle Collective menu (on the bottom left). Click your user nameto view the Account Settings page. You’ll find your UID listed on the Account Settings page. All ShopStyle Collective UID’s start with “uid-“.
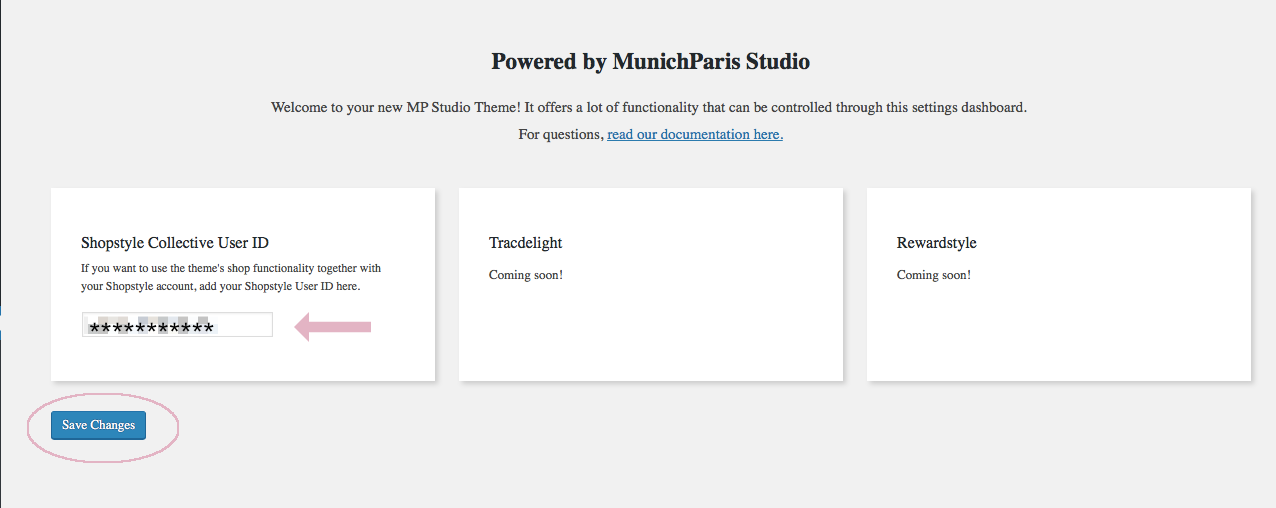
Copy the UID and navigate to your WordPress dashboard and click on Settings > MPS Fashion Blogger. There you paste the copied UID into the ShopStyle box. Don’t forget to click on save to secure the changes.
Now you need to create a shop page – click on pages and add a new page. You can name the shop page just as you wish – please paste following code into your shop page
[shopstyle_store listid=LISTID]
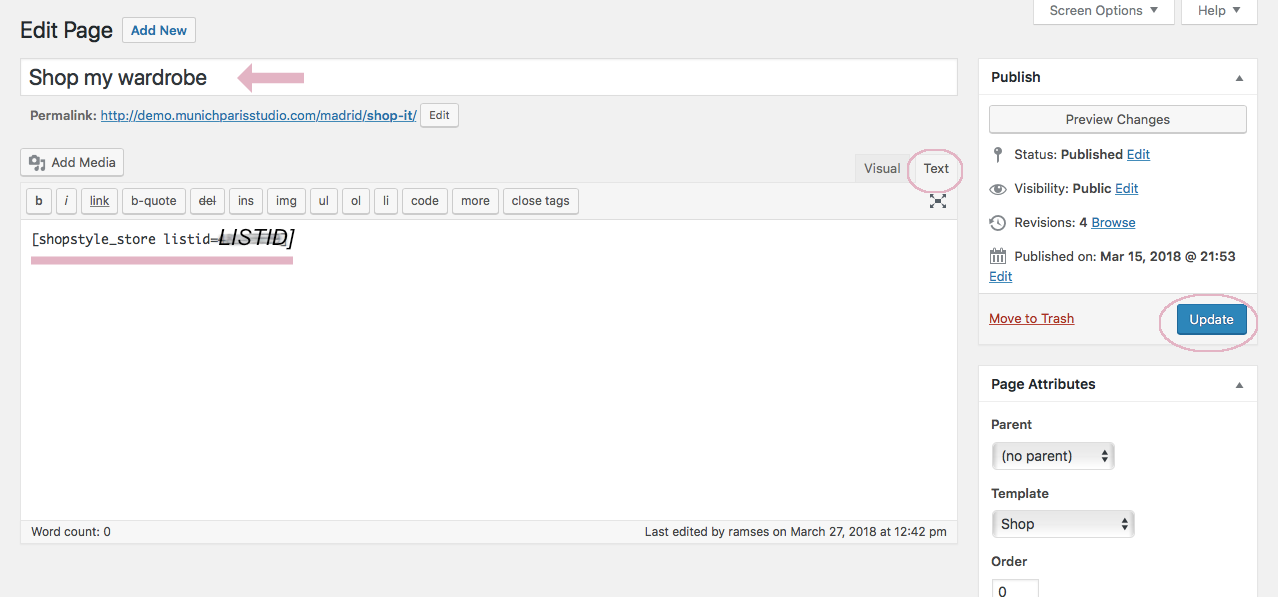
Keep in mind to paste this code while you are in the TEXT MODE of your Page Editor. You will later replace LISTID with the digit code you’ll get from ShopStyle Collective when you create a Product List.
Note! Make sure you have selected the Shop Page as a Shop Template. On the right hand side of your Editor you’ll find the option to give the page different Templates. It’s important that you choose Shop.
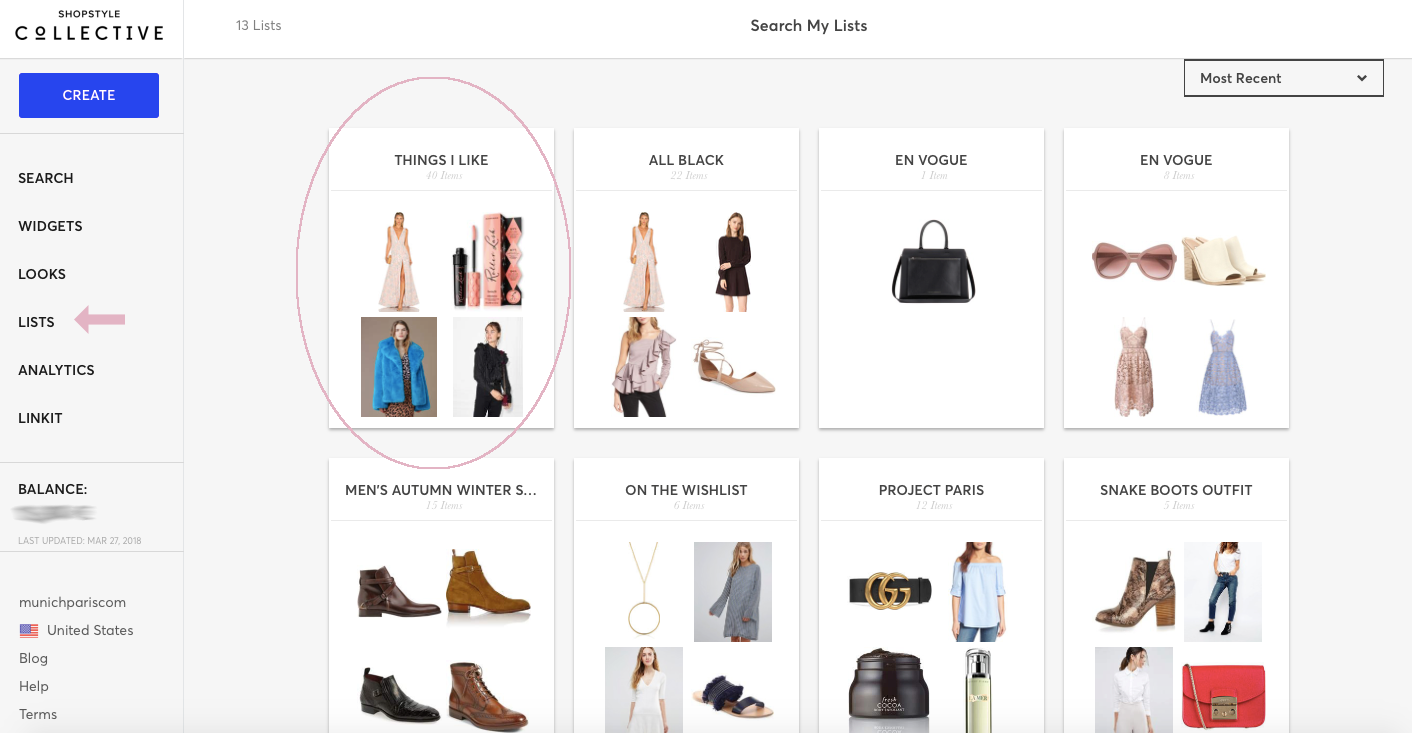
Now after you prepared your theme to use the Boutique (shop page) you can go back to your ShopStyle Collective dashboard and start creating Lists (Product Lists).
CREATE A LIST IN SHOPSTYLE COLLECTIVE
Creating a list is easy and helps you organize and update your content on the go. You can create a list right in the ShopStyle Collective search page, or from the Linkit tool as you shop on the web. Here you’ll find a detailed instruction on how to create Lists.
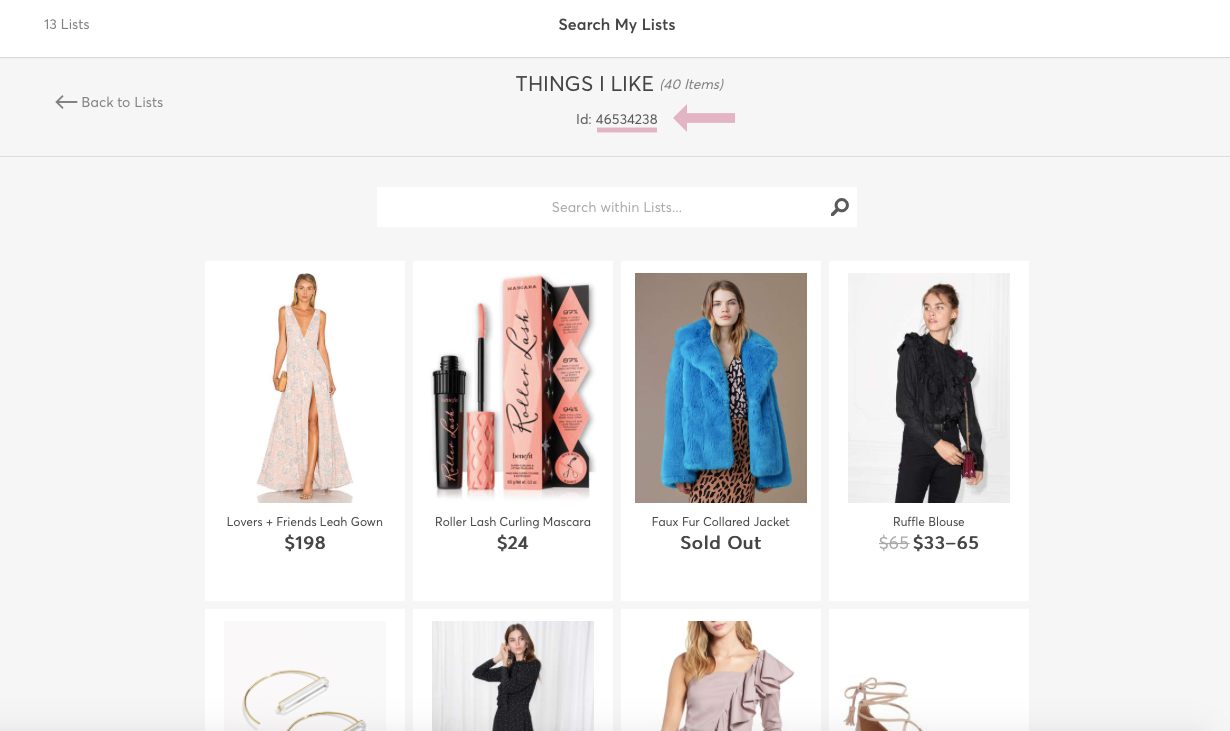
Once you’ve successfully created a list you can find it at LISTS (on the left hand side menu in your dashboard). Click on one of the lists you like to display in your boutique. Below the title of your list you’ll find the LIST ID – a series of digit code. Copy the code and navigate back to your WordPress dashboard.
How to manage products in your Boutique
Now replace in your shop page the part which reads LISTID with the digit code you copied from ShopStyle Collective. Click on update to save the changes. Your shop page will now display the products you curated in your List from ShopStyle Collective.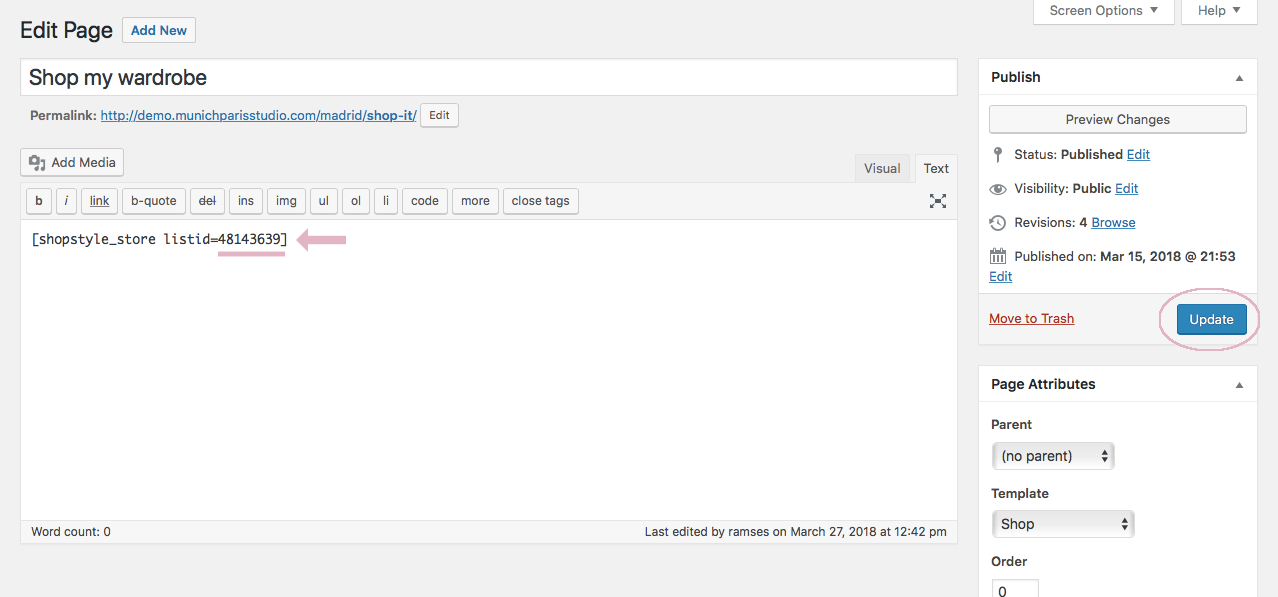
If you want to expand or decrease the amount of products in your Boutique you do it easily by editing the List in your ShopStyle Collective dashboard. Just add a product to the list or remove it from the list. The code will automatically display the updated version of your list on your blog. Sold Out Products will not be displayed!
Pro Tip! If you like to have a nicer look of your Boutique Page we recommend that you set a Featured Image that will serve a Banner Image on top of your Boutique Page.